Point of Sale (POS)
Home → Point of Sale (/pos) is the register. It is meant for a counter: search or scan an item, build a cart, take payment, and confirm. The same sale can be typed later under Documents, but POS is faster when the customer is standing there.
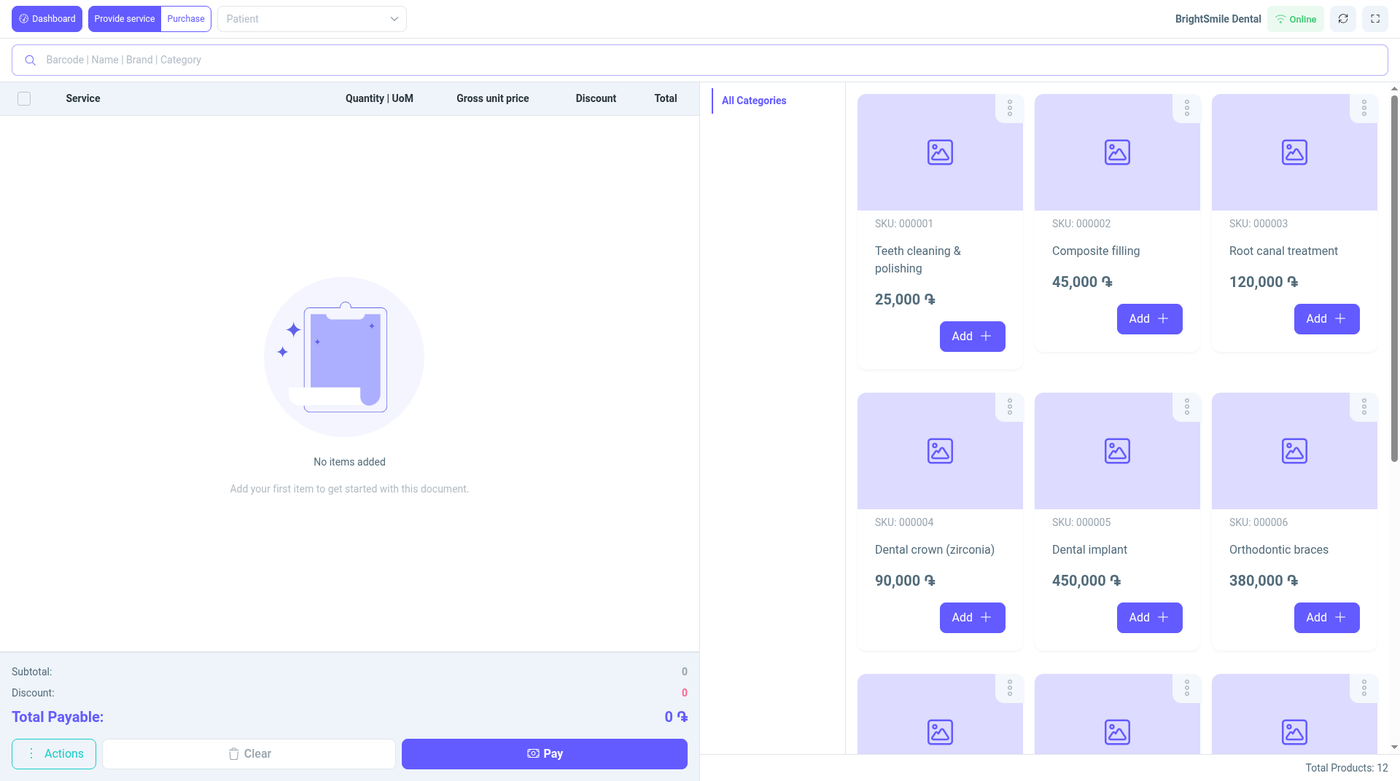
The screen has two modes.
| Mode | What confirming does | Permission |
|---|---|---|
| Service provision | Posts a sale for the services or products in the cart | POS: view, create, edit, print, and confirm |
| Purchase | Posts a purchase (goods coming in from a supplier) | The separate Purchase rights on the POS module, including confirm |
You can open the screen with view access. Confirm is what posts the cart. Without it you can prepare a cart but not finish the sale.
Sell (service provision)
- Choose Service provision.
- Search the catalog or scan a barcode. Only active items appear, unless the company allows deactivated items in pickers.
- Add quantities to the cart. Prices come from the catalog and from the customer’s price list when you select a customer.
- Select the customer if this sale should sit on their balance. A walk-in can stay without a contact only when your process allows an unnamed sale.
- Choose the branch and the wallet that will receive the money.
- Take the payment amount. A partial payment leaves a balance on the customer. A full payment marks the sale paid.
- Choose Pay. That creates a confirmed sale: stock falls for products, a membership attaches when the cart sold one and memberships-from-sales are on, and the money is written to the wallet. The purchase mode uses Confirm for the same posting step. If your role allows only one mode, the register opens in that mode.
Print uses your receipt template when you have print permission. If the branch has a fiscal device, confirm can also send a fiscal receipt. The receipt number then shows on the sale in Documents.
Buy (purchase mode)
Use purchase mode when stock arrives at the counter and you do not want to open the full purchase form.
- Switch to Purchase.
- Add the products or materials and quantities.
- Select the supplier.
- Choose Confirm. Stock at the branch increases, and the amount you did not pay remains a payable on that supplier.
You need the POS purchase permission, and confirm, for this mode. People who only sell will not see a working purchase action.
What is posted
A confirmed POS sale is a normal sales document. You can open it later under Documents, reprint it, or take another payment. Cancelling it follows the same rule as any confirmed document: you need Cancel confirmed documents. A draft cart that you never confirm does not change stock or wallets.
Permissions
| Right | Service mode | Purchase mode |
|---|---|---|
| View | Open the register | Open purchase mode |
| Create and edit | Build and change the cart | Build a purchase cart |
| Print the receipt | Print the purchase | |
| Confirm | The sales button is labeled Pay. It posts a confirmed sale | The purchase button is labeled Confirm. It posts a confirmed purchase |
Tips and common problems
- The item does not scan: the barcode on the catalog variant does not match, or the item is inactive.
- Pay or Confirm is hidden: your role can open the register but cannot create that kind of document.
- Stock did not fall: the cart was not confirmed, or the line is a service. Services do not keep stock.
- The wrong price appeared: the customer’s price type overrides the default selling price. Check the contact’s price list.
- Fiscal receipt failed: the branch has no enabled fiscal device, or the device is offline. The sale can still be confirmed. Retry the fiscal send from the document when the device is back.